7 Simple Ways to Practice Sewing Straight Line Stitches Straight line stitching How many times have…
Adjust Your Sewing Machine Tension Today
Are the stitches coming out of your sewing machine looking weird and unrecognizable? So, you think you need to adjust your sewing machine tension today, right away, immediately! You’re in the middle of a project that you absolutely must finish today and this is the last thing you need today.
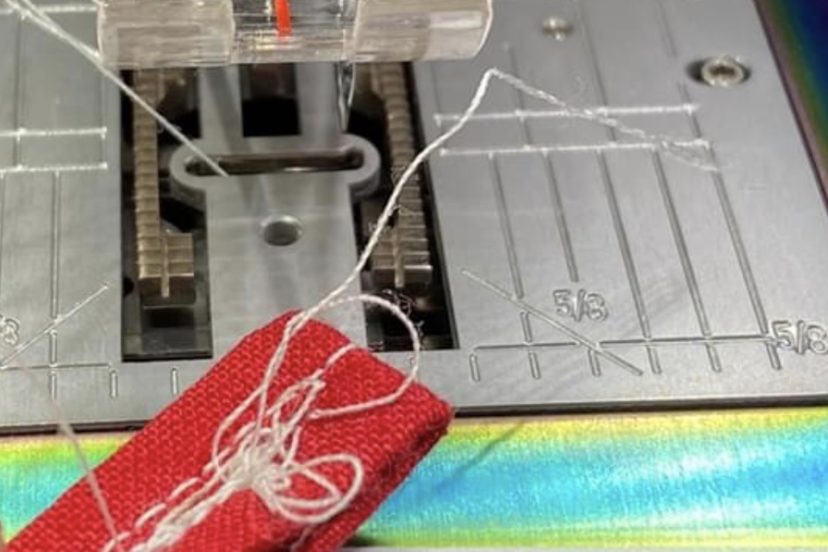
Your sewing machine tension has been fine until now, then all of a sudden the stitches are loosey goosey. A real bird’s nest underneath the bottom layer of fabric.
But, wait! Before you touch the tension, take a deep breath, slow down and grab your manual. The tension on your sewing machine is usually preset and tested for perfect stitches at the manufacturer before the machine is shipped out. However, depending on the fabric you have selected, you may think that the tension needs adjusting to form proper stitches. Yep, getting perfect stitches is a balance between the fabric you’ll sewing on, the thread you are using and the size of your sewing machine needle.
- Start with the needle. Make sure you have the right size according to the fabric you are sewing with; the eye needs to be large enough to also accommodate the thread you’re using. Change the needle; it may have hit a pin or it’s dull from overuse. Or, lint, dust or some other type of debris could be blocking the stitch.
- Take a look at your upper thread and examine the spool to ensure it’s not fraying and is flowing off the spool smoothly. Sometimes, there’s a little nick or cut in the spool designed to hold the thread during storage, but can get caught on it as the thread comes off the spool. Simply, turn the spool around in the opposite direction to avoid contact with the thread.
- Remove the top thread spool and rethread your sewing machine with the presser foot raised, which opens the tension discs and allows the thread to set between them properly.
- Lastly, check the lower part of your sewing machine by lifting the presser foot plate to remove any broken needle pieces, dust or lint. Sometimes the smallest piece of thread stuck in the bobbin case or other hard-to-reach areas can cause all kinds of havoc.
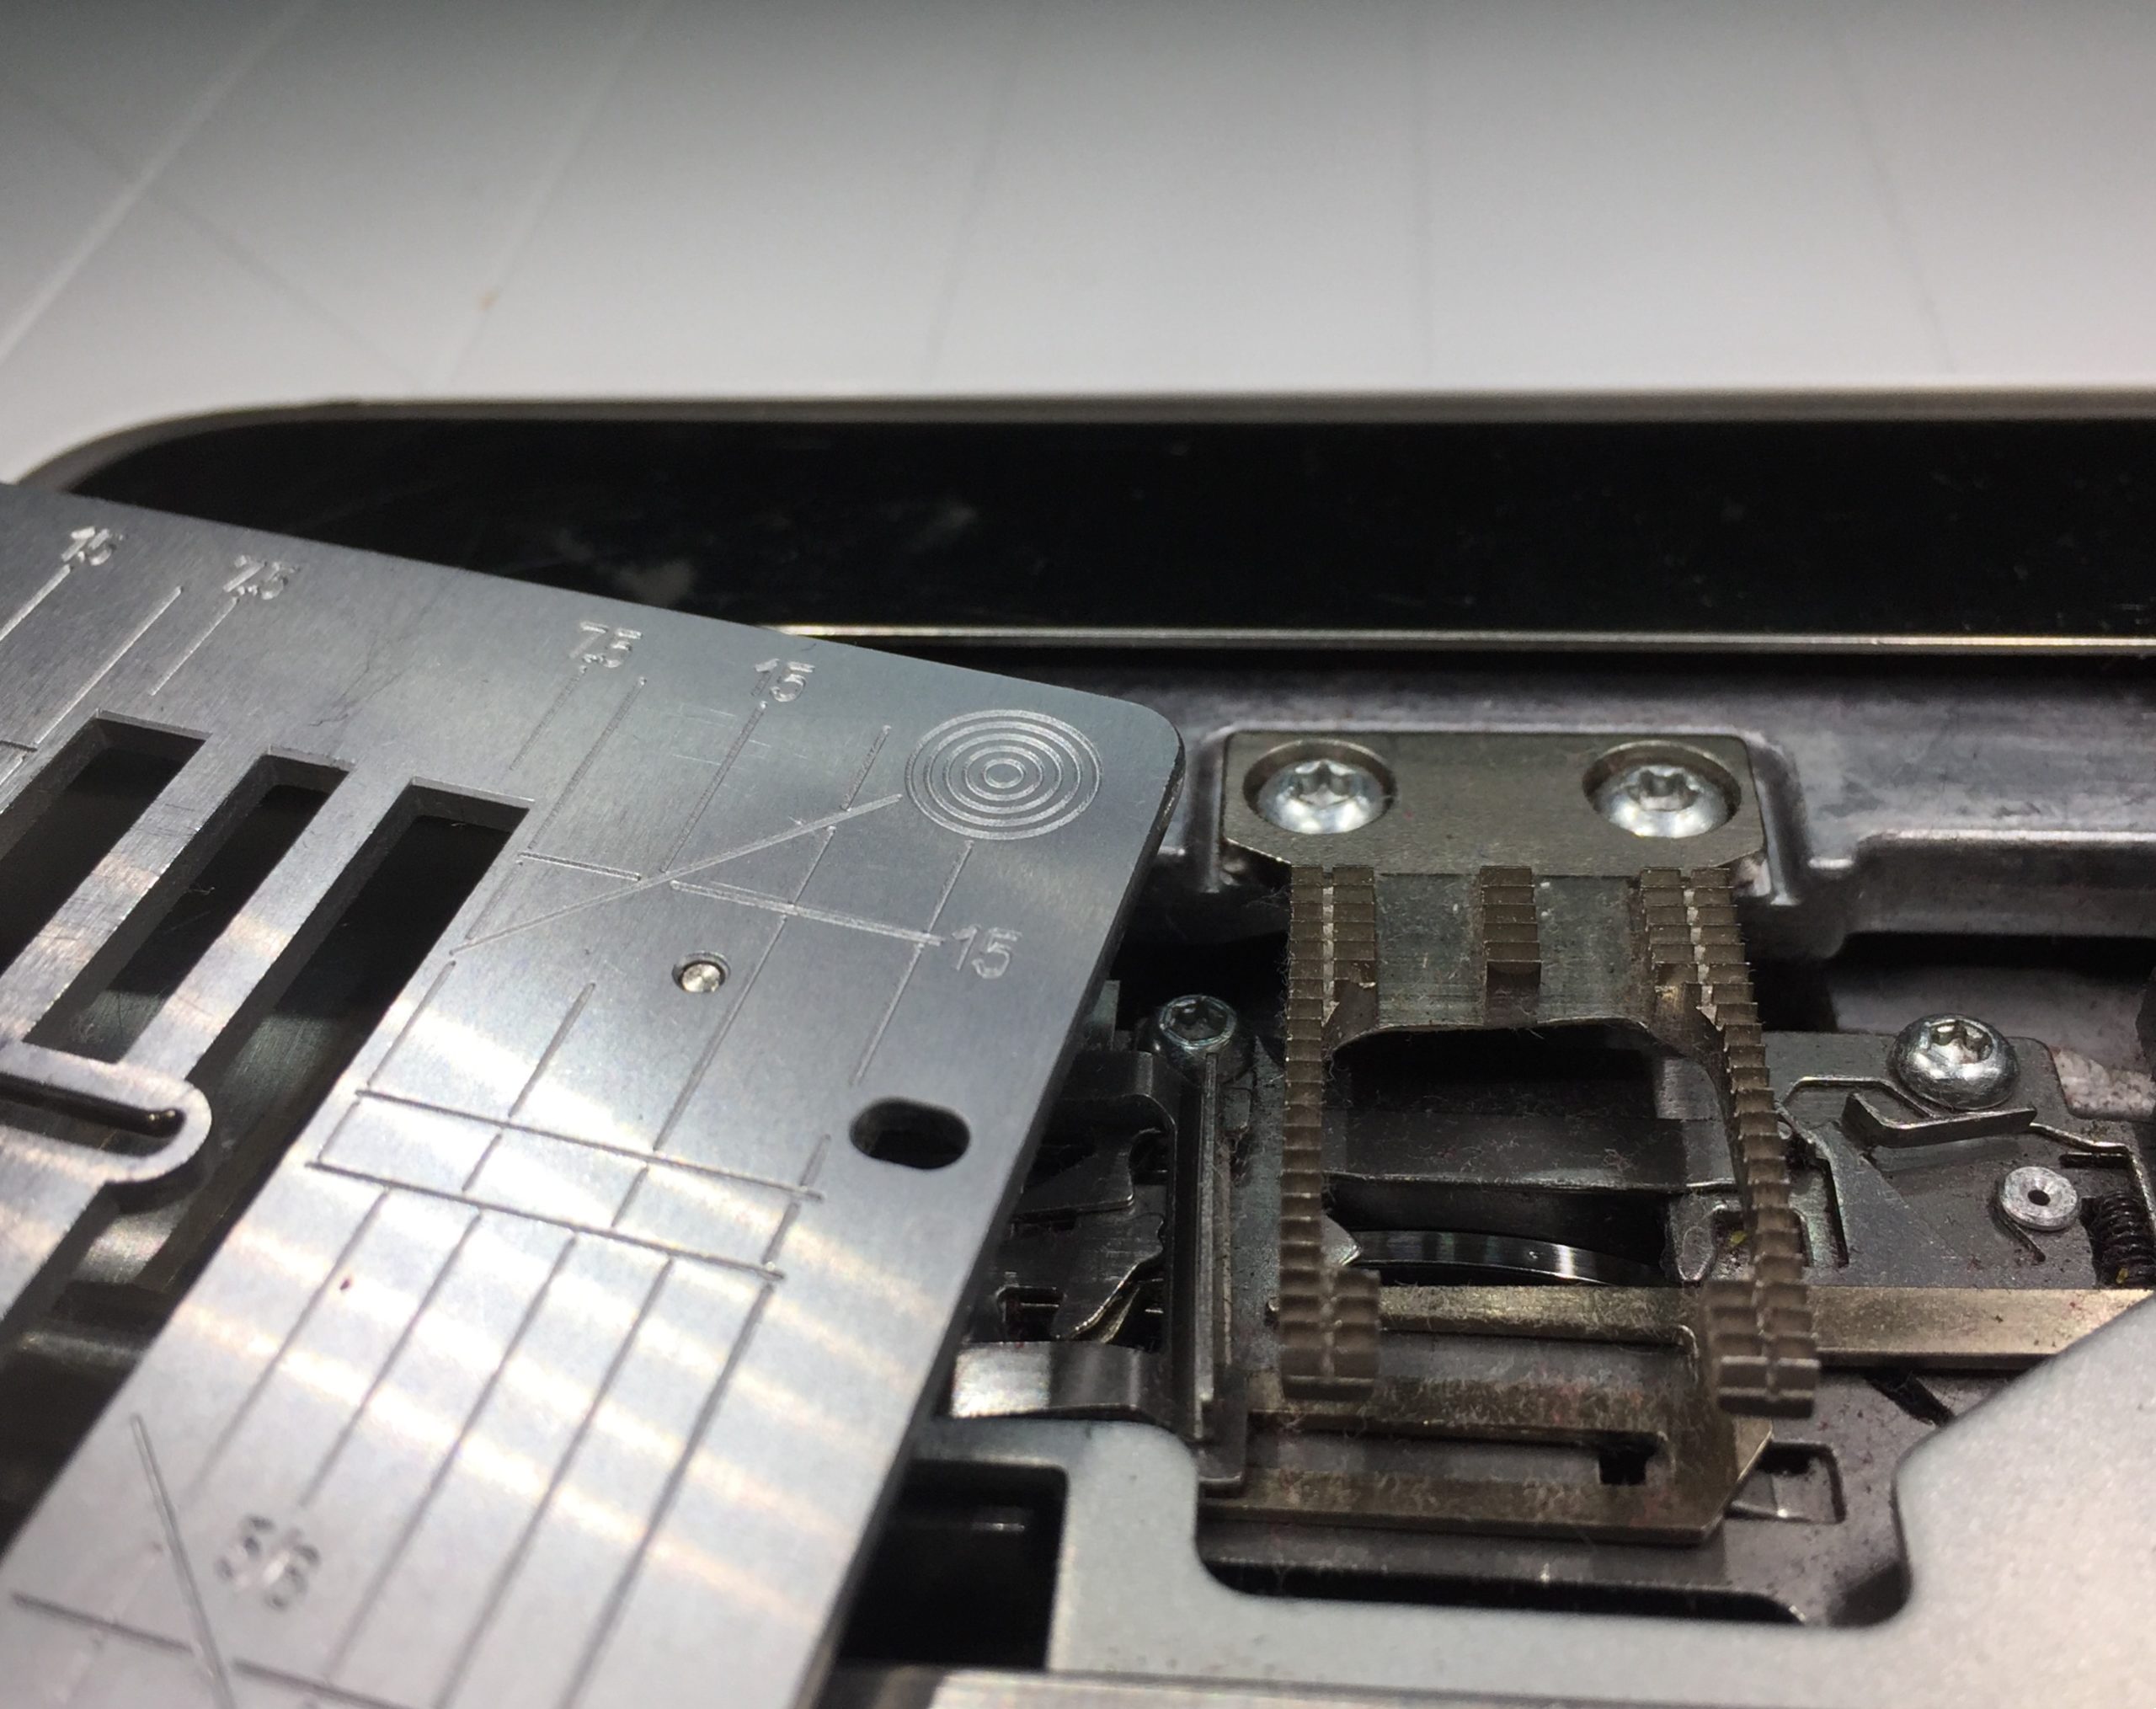
5. Lastly, last, remove the bobbin from the case. Look for any lint around the bobbin tension spring, then reload the bobbin in the case with the thread going counter clockwise.

6. Some sewing machine bobbins are designed to fit in the case in only one direction; others can go in either way. Just make sure you have inserted the bobbin following the manual’s instruction.
7. Test your stitches
If the problem is not resolved with the steps above and your stitches are still looking weird, you may need to adjust your sewing machine tension.
Follow the recommendations below:
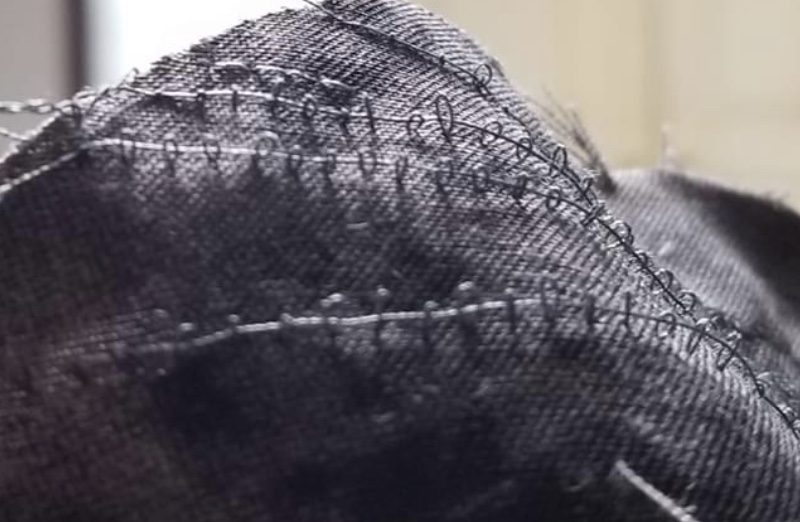
– Stitch about 3” on the bias of both length wise and crosswise grains. It will be helpful to use a different color for the upper thread and the bobbin thread.
The upper tension controls the thread that goes through the needle. If it is too loose the thread on the underside of your stitching will appear to lay flat on the surface of the fabric.
– If the thread appears to lay flat on the upper side of your fabric, the upper tension is too tight. The ideal stitch is when the thread tensions are in balance and both threads are drawn equally into the fabric.
– To test further, hold the fabric at both ends of the stitching line and pull sharply until one of the threads breaks. The color of the broken thread will usually indicate which tension is too tight. If both threads require moreforce to break evenly, the tension is balanced. No matter which tension is wrong, the correction should always be made by adjusting the upper thread tension.
Do not adjust the bobbin tension until you have exhausted all other methods possible.
More to Explore